 |  |  |  |
To setup a File Server (in Enclose Setup assistant)
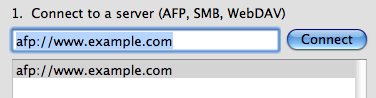 1a. Enter URL-style address of the server in the “Connect” field. Depending on the type of server, this starts with “afp://” (Apple File Sharing), “smb://” (Windows), or “http://” (WebDAV).
 Or, from the list of servers (if shown), select a server.
1b. Click Connect. Respond to any login authentication or volume choice windows that appear. There may also be a request to grant Enclose access to your Keychain. The server then appears on your Finder sidebars and Desktop.
2. Click Choose Folder. Use the sheet that appears to navigate to the server’s folder that should hold Enclose’s files for sharing.
This folder must be included in publicly-reachable web space.
Enclose will create a folder called “Enclose” inside the folder you choose. If an Enclose folder already exists on the server, don’t choose it, choose its parent folder.
Click Choose. The panel confirms your folder location in small text.

File Server Setup (part 1)
This page describes the one-time Enclose Setup assistant. To set up a file server after the first run of Enclose, see Servers Preferences. Enclose Setup includes panels for setting up a file server.
File Server: Choose Web Site Folder
We call a Finder-mounted server a “File Server” (as opposed to MobileMe or FTP). This includes servers that provide Apple File Sharing (AFP), Windows Sharing (SMB), and WebDAV. In general, if you can put a server on your Mac desktop, you can use it as a File Server with Enclose.
Enclose creates a folder named “Enclose” on the server in the place you designate. This folder holds the files you send using Enclose.